Build a diy pantry cabinet with drawers for better kitchen storage. Follow easy steps to create a stylish, organized pantry.
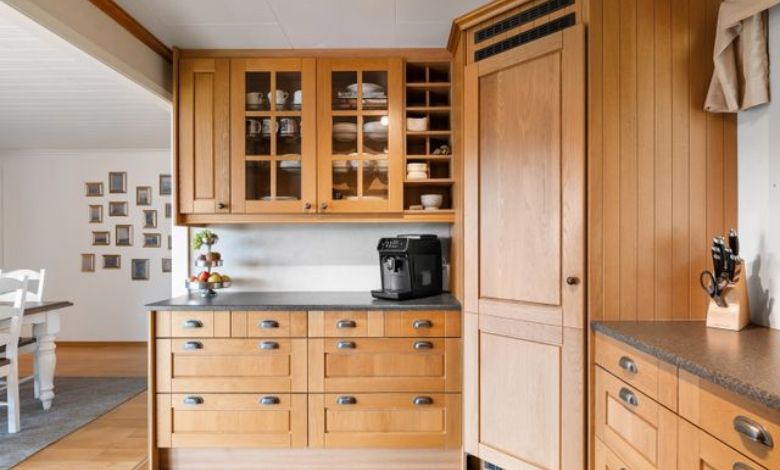
I still remember the first time I opened a deep kitchen cabinet and realized how much storage was wasted. The front seemed organized, though the back? It was a different story. Spices disappeared behind jars, oil bottles tipped over, and half the time I had to pull everything out just to find one item. That frustration is exactly what inspired this DIY project and showed me how a simple storage upgrade could make a huge difference in everyday kitchen organization.
This is precisely the reason. A diy pantry cabinet That’s how it is with drawers a practical project. That is changing awkward cabinet space in storage that actually works. Instead of reaching out blindly in a dark corner, You get easy access to withdraw, better visibility, and a setting that does. Everyday cooking is very simple.
For what he wants a diy pantry cabinet With unrestricted- standing drawers, this project Especially useful because it can withstand. On its own, I fit an unused kitchen area, and convey the order to a space which was not achievable to manage. And if you try to keep costs low, a cheap one diy pantry cabinet can still look polished and works beautifully when you use it. The right materials And a smart build plan.
This guide flows through the entire process in a clear, step- by- step way, so you can build a cabinet that is solid, attractive and genuinely useful.
Why a DIY Pantry Cabinet with Drawers Makes Sense
A deep pantry cabinet often seems that way a good idea unless you actually use it. The problem is simple: on objects the back is difficult to reach. This means supplies get wasted, bottles get pushed around, and storage becomes frustrating rather than helpful.
A drawer- based pantry solves that. That issue By bringing the contents Outside you can perceive everything at once. You can sort by category. You can take what you need without emptying. The whole shelf.
It is especially useful for:
- Spice
- Cooking oils
- Condiments
- Baking equipment
- Canning
- Snack bins
- Small kitchen tools
Evaluate it as upgrading from a messy closet to a dresser with drawers. Same room. Much better access.
Tools and Materials
you will need before you launch, cut anything, assemble. Your tools and materials. To be everything ready, make the build smoother and help to avoid mistakes later.
Tools
- Drill
- Impact driver
- Circular saw or table saw
- Kreg jig or pocket- hole system
- Speed square
- Measuring tape
- Clamps
- A nail gun or brad nailer
- Sandpaper
- Or sander
- Iron for edging
Materials
- Laminate board or plywood sheets
- Edge bands
- 1/ 4- inch pocket screws
- 1×2 pine or scrap wood
- Drawer rail mechanism
- Spacer pieces
- Optional dowel to tall bottles
To a cleaner furniture- like look, Plywood works well. Gives the cabinet a more finished appearance and can make the whole project Perceive more advanced. If you aspire to classic cabinet construction plywood It is also a strong one reliable choice.
Planning the Cabinet Before You Take a Bite.
One of the biggest mistakes I make is that DIY storage projects accelerate the planning stage. It’s tempting to begin cutting right away, but a little prep can save you a lot of frustration.
Before you build, Goal:
- Cabinet height
- Cabinet depth
- Cabinet width
- The size of the items
- You want to retain
- The slide clearance is necessary for the drawer rails
If you build a spice And oil drawer, Think about what will sit on each shelf. Taller bottles require more space. Smaller jars can be stored close to each other. Good planning makes the drawer more useful than day one.
A helpful trick to install the cut pieces outside the floor before assembly. He makes them. It is easier to imagine the final cabinet and catch problems of all sizes initially.
Step 1: to cut the Laminate Board or Plywood
Start by cutting. The main pieces to the drawer cabinet. If you have a table saw or circular saw, use it to clear, accurate cuts. If you haven’t one, most hardware stores You can cut the panels to size for you.
For pull- out drawers, the basic measurements can be adjusted based on your cabinet size, But the key To maintain everything square And constantly.
A good workflow looks such:
- To cut all panels first
- Check the fit
- Before assembly
- Apply edge tape before finishing.
- Build When possible
That last part It is more significant than individuals evaluate. It is very easy to eliminate. The edges First the cabinet is fully assembled.
Step 2: Build. The Outer Frame of the Drawer
Once the pieces Cut, start collecting the outer frame. Brand the shelf On positions the front and back panels everything stays Even Use a speed square To preserve the corners Connected it can work. A small step, but it makes a huge difference in the final fit. A drawer that is even slightly out of square can pull, stick or sit crooked. The cabinet.
To a spice or oil drawer, the height of the shelf must be suitable for the items you intend to preserve. You want enough room for tall bottles, but not enough room that you are wasting space.
A simple build like It works best when every inch is a purpose.
Step 3: Connect. The Back Panel
After the frame is fixed, attach the back panel. These locks the structure helps to stay in place. The drawer square.
Be careful with your nail or screw placement. A marked guideline helps prevent mistakes and prevents punching out fasteners. The wrong side. This type of careful alignment is one of those small habits that saves a project.
Step 4: Add the Side Supports
Then you add the side supports. These pieces help to strengthen the cabinet and provide a base to the drawer slide system.
Scrap wood Works well here, then one reason This project can be budget friendly. You don’t have to. Expensive material to every part of the build. Save the premium material to the visible surfaces and use scraps where it makes sense.
If a support piece fits well, gently tap into place with it a mallet instead of trimming too much. A tight fit Indeed, it may be a good thing In wood when it is controlled and deliberate.
Step 5: Install. The Back Supports
Now it’s time to add the back supports. These pieces are important because they pursue to maintain the drawer rail components. It allows the drawer to slide in and out easily.
Since these supports take more the sliding load, they must be substantial and secure. If your drawer will hold taller bottles, Consider adding an extra round dowel near the top shelf. This small increase can help to maintain. The items are stable and prevent them from moving at this time. The drawer moves.
This is one of those little upgrades. It does the cabinet Encounter more polished and practical.
Step 6: Install. The Drawer Rails
Drawer rails is the heart of the project. They make easy to use cabinets every day.
Establish by separating. The rail pieces according to the manufacturer’ s instructions. A part is attached to it. The cabinet wall, and the other attached to the drawer itself.
A very important detail here is clearance. Drawers demand a slight gap so they can slide easily. They never rub directly against the cabinet walls. This is why spacers are so important during installation.
Use a spacer to create the correct distance And keep the rails Attached A drawer The slide feels clean. Good every single time you use it. This is one of those simple things. It makes the whole project Able to the effort.
Step 7: Connect. The Rails To the Cabinet Wall
Mount now. The slide pieces to the inside of the cabinet. If the cabinet is a face frame or a door opening, You may warrant distance lists to create. The clearance Rails are needed.
This step It’s all about balance. The rails need to sit far back. The drawer Fits perfectly inside the cabinet, But not esteem this far back That you can’t draw the drawer all The way out A smart approach To be used a rail length Which is slightly less than that. The cabinet depth. It gives you enough movement without making the drawer feel cramped.
Where is this too? A diy pantry cabinet with drawers freestanding can be particularly useful. Since the cabinet stands its own, You have greater freedom where to place the distance support. They Warrant and fit. The drawer system To the structure.
Step 8: Fit the Drawer Into Place
Before putting everything down permanently, do a dry fit. The drawer inside the cabinet.
This means keeping it in the no position final fastening. Check. The alignment. Confirm. The level. Make certain the drawer moves easily and sits evenly. The spacers.
Dry fitting may feel slow, but it is one of the smartest parts of the whole build. It gives you a chance to catch problems earlier and be persistent. That is to express the difference between a frustrating project and a satisfying one.
Step 9: To terminate the Exposed Edges
Once the drawer is assembled and assembled, finish the visible edges with iron- on edge tape. This is the part which gives the cabinet a clean, professional look.
The process is simple:
- Place the edge Banding on the exposed side
- Use heat to secure it in place.
Trim off the excess sand and the edge smooth If your board the edges show rough MDF or unfinished material, The edging immediately hides it. This is one of the easiest ways to make looks favor a household cupboard. A custom piece.
This step is especially critical if you pursue it. A cheap diy pantry cabinet with drawers which still looks high quality. Being budget friendly doesn’t mean incomplete.
Why This Project Saves Space and Money
One of the best things about this build is, it uses the space you already have. Instead of buying a brand- new pantry or redoing an entire kitchen, You can do better the storage area You are already the owner.
This makes the plan a smart option to:
- Small kitchen
- Awkward storage corners
- Existing pantry cabinets
- Redesign of the budget
- Tenants who require better organization
You don’t have to. A huge renovation To make a big difference. Sometimes one well- planned cabinet can solve the storage problem better from a full redesign.
Tips To Make Simple Construction
Here are a few practical tips Who can save time and stress:
- Measure twice before cutting.
- Apply edge tape first. Full assembly when possible.
- Use spacers to retain the drawer slides level.
- Dry fit the drawer First final fastening.
- Match shelf height To the items You require to save.
- Sustain design simple If you want to save money.
- Use scrap wood where it will not be seen.
These steps might sound basic, but basic is good. In DIY projects, the easiest way is often the one that works best.
Best Uses to the Finished Cabinet
Once the cabinet is done, you may wonder how you ever lived without it.
A finished pantry drawer Perfect for:
- Spice pots
- Cooking oils
- Vinegar bottles
- Baking ingredients
- Tea and coffee supplies
- Sauces and condiments
- Snack organization
- Small kitchen items
This is one of those upgrades which feels small. First But change the way you use your kitchen every day
Final Thoughts
- A diy pantry cabinet with drawers is more than just a woodworking project.
- This is a practical storage solution.
- It makes the kitchen easier, easy to use and keep in order.
- If you require flexibility, a diy pantry cabinet with drawers freestanding gives you a great way to optimize storage without committing a full kitchen remodel.
- If your main goal is to keep the budget, a cheap diy pantry cabinet with drawers can still be strong, attractive and highly functional when you plan carefully and build with purpose.
- The best part of this project is simple: it makes for frustrating storage.
- Useful storage.
- And when you start using smooth extractions drawers, it’s rigorous to imagine going back.
Additional Resources
- Kreg Pocket- Hole Joinery Guide, Useful for learning strong hidden cabinet joints And general pocket- hole construction.
- Kreg Cabinet Project Plans, Useful for several cabinets and built- ins. Storage inspiration.
- Rockler Drawer Slide Guides, Useful for selection and installation of the right drawer Slides for your project.


