Do it Yourself Drapery: Simple custom curtains for Any Room Step of Step Learn Cost Effective Sew And no Sew Curtain Ideas.
Do you ever see a window in your own home that you wish was better than it is? When looking for something better than Custom Drapery, the first thing that comes to mind is: Custom Drapery prices are too high for me! So, when I started thinking seriously about making my own drapery, I thought about how it would be one of those craft projects that is pretty easy on paper, but once you start working on it ,you see the other side; the unfinished fabric draped over the dining room table, the threads on the floor, and a nice feeling of remorse as the project progressed. But, once I learned what the basic formula was for making drapery, everything changed.
DIY Drapery became one of those few home improvement projects that actually saves you money, provides your home with a custom look, and allows you to easily change things—so you won’t regret the money spent on it! This is the main reason why people look for DIY drapery ideas and do-it-yourself projects, as they are also looking for curtains and simple ways to upgrade their spaces.
They are looking for a practical way to make a room feel finished, softer, and more personal without hiring a pro or spending a fortune. The good news is that you can absolutely do that, even if you are a beginner.
Creating polished and finished curtains, whether you’re sewing them or using a no-sew method, starts with the right measurements. When measuring for length, measure from the top of the curtain rod to where you want the curtains to finish then add on extra inches if you’re going to be hemming the curtains and to account for the header. For width, a standard rule of thumb is to multiply the window width by 1.5-2 times to get your fullness. (Source: The Spruce)
Why You Should Make Your Own Drapes:
The primary reason people want to make their own drapes is due to the expense of custom made draperies. There are store bought options available; however, rarely do they provide you with exactly what you desire based on your measurements, fullness, style, etc. When making your drapes, you have total control over everything from the fabric, to the color and texture of the fabric you use to the trim detail, the style of the header, and how the curtain bunches on the floor or drapes to the floor. The satisfaction that comes from completing this type of project is immense due to the complete control you have in creating the end product.
In addition to feeling accomplished after completing a DIY project, you can save financial resources when undertaking the project yourself.
If you plan on moving frequently, like to change the décor of your rooms every few months due to the seasons, or simply enjoy changing your home décor often, this type of project has the potential to save you money in the long run. There are many beginner level sewing and home décor instruction sources that provide DIY curtain tutorials to new sewers with the specific focus of using simple construction methods, simple hems, and simple installation methods so even a new sewer can create a beautiful project.
Once you’ve made your first pair of curtains, all of your future curtain-making projects will be so much easier! Like many of us, you probably felt all these years that making curtains was something completely overwhelming. However, once you’ve made your first pair of curtains, you’ll realize that they are not nearly as overwhelming as they seem. Making curtains is like baking your first loaf of bread – while making bread may seem so complicated at the beginning, after you’ve made your first few loaves and know the order of your steps, it will seem so much less daunting to you.
Things You’ll Need To Get Started
When sewing your curtains, you will need three primary essentials to finish your project: a sewing machine, a spool of standard thread, and scissors designed to cut fabric. These are the only items you really need for your sewing project. Based on the style of curtains you wish to make, you may also want to include an iron and/or pins, a measuring tape, and if you are going with a no-sew option, some heat-activated tape for finishing. When planning to use no-sew hem tape on your curtains, many sewing resources recommend using an iron to press before sewing your seams. This will produce straight seams. With straight seams, you will save time when it comes time to actually sew your curtains – therefore producing quicker results!
(Sailrite) One of the easier ways to get organized is by grouping your supplies into categories:
A tool to cut fabric., tool to measure., tool to hold the folds.
An edge finishing tool (or sewing edge tape) can be helpful to you as well.
By using this easy organizational technique, you can help ease any hesitations about doing your project.
Step One – Measure the Window Correctly
Remember that DIY curtain projects can run into trouble in this area, so don’t rush to this step. To measure how wide your curtains should be, measure the part of the room you will be covering with your curtain rod. The standard amount of fullness you should have in that area is between 50% to 200% of the length of the rod.
For example; if your curtain rod is 100” the recommended amount of fullness for a relaxed gathered look is 150” (1.5) or for a more tailored gathered look would generally be 200” (2.0).
For measurements of the finished curtain length from the top of the rod (at the height of the top of the rod) to where the curtain should end, then add the extra fabric you will need for hems and the curtain header (i.e.; rod pocket/cap). Blogs like The Spruce, Sailrite, etc., provide information regarding making accurate finished length measurements for different header styles since headers usually add some effect to the overall length measurement when determining how much fabric you actually need.
There is also some additional information to keep in mind regarding how to plan for cutting fabric to ensure you have the appropriate end product: If your curtain is going to have a finished length of 100”, then you will not be able to cut exactly 100” of material without accounting for some allowances in the area of the 100” finished length; typically one will need to add additional length for the top pocket(s), any hem and/or fold, overs will need to have additional length added in addition to the actual fabric measurement. In the example that was provided in the competitor info, the final finish length for the panel was indeed 100” but the total cut length of the fabric was 112” to allow for the rod pocket and hem.
Step 2: Selecting the Appropriate Material
The kind of material that you choose will determine how your room feels and looks. Cotton is easy to work with and works great in a casual environment. Linen has a lighter, more relaxed and breezy structure than cotton does. Velvet is a fabric that will create depth/and or drama in the design. Heavier fabrics can create a more luxurious and elegant look than lighter works will, although the latter can create a breezy feel.
If you are not experienced with sewing, a medium-weight home décor fabric would be an ideal choice when starting to do your projects. It will be much easier for you to sew it, than it would to sew slippery or thinner materials. The material will also be an excellent option if you are looking for some impressive DIY curtain ideas. A set of beige/brown linen curtains may give you a contemporary and peaceful space, whereas a set of patterned cotton curtains would add brightness to that area. Completely changing the appearance of your room does not necessarily have to be expensive, with a dark velvet curtain you can create an elegant look in any area without needing to replace any furniture.
Function can also dictate the material you choose. If you are looking for greater light control, materials such as blackout fabric and thicker fabrics will offer a better solution for that purpose. According to DIY curtain projects from both Sailrite and HGTV, there are many factors involved in the final drape and operation of the curtain that you will need to consider including the use of lining or not, fabric weight, and how you choose to finish off the top of the curtain panels (i.e. heading style).
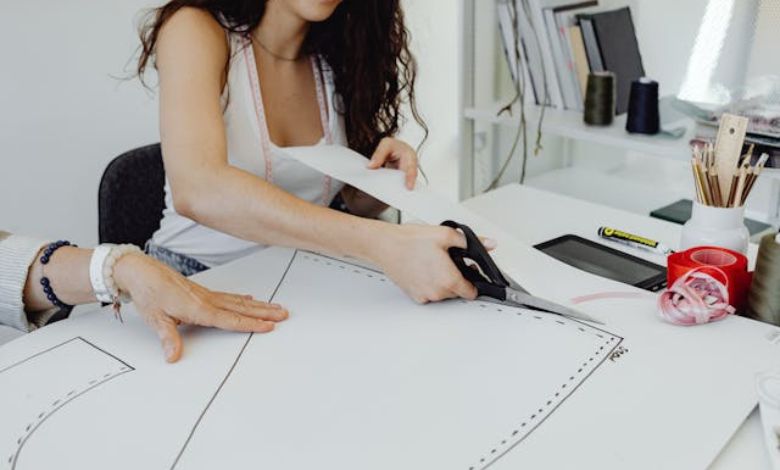
Step 3: Cut Carefully and Press First
While this step may seem extremely simplistic it is where you really start to see your project coming together.Once the measurements have been taken and a pattern has been created based on the size of your fabric, it is time to cut the fabric. If you are using a fabric with selvedges, you should consider cutting off the selvedge edge because the extra bulk from the tight selvedge may cause your fabric to pucker and hang unevenly. Many sewing books will also recommend that you press the fabric and seam allowances flat prior to sewing to make for neater edges and provide a stable edge to hold the fabric while sewing.(The Spruce)
I always skipped this step with the thought that it is unnecessary; however that is not the case. It was one of those little things that will save you time and effort later on down the road.Evaluate of it as creation a good base to build a house But Everyone is excited to build a house, but no one ever gets excited to lay the foundation; however the entire process of building that house will be based on the quality of the foundation.
Step 4: Sew the Sides First
To create a regular curtain panel that has finished edges at the bases, you would generally sew the side edges together as a first step in the construction of the panel, then sew to the top edge, and finally sew down to the bottom edge of the panel. The order in which you do these steps allows you to conceal any raw edges of fabric within the folds of the finished panel. Commonly, you would take the side panel fabric, fold over the edge of each side panel once and press down, and then fold that same edge again to form a pocket and sew a single straight stitch down the entire side panel. This gives the curtain a cleaner, more professional looking finish on the side seams. (The Spruce)
If you are making the curtain panel from scratch, it can be very satisfying to watch your project become a finished piece of drapery instead of a large piece of material.
An additional tip which can be beneficial when using the competitor material is that most times you can leave the selvedge on if it helps maintain width. This is especially helpful when creating a wide panel and you would like to give the fabric more fullness. In addition, leaving the selvedge on works very well when it has a clean, finished look and will not affect the finished look of your drapery.
Step 5: Create the Top Header or Rod Pocket
How the curtain is hung will be determined on the top portion. You can choose from a basic rod pocket with heading tape or curtain rings, depending on your choice of design. Different types of heading styles also impact the appearance of the overall design and manner in which they are installed (Sailrite, HGTV).For instance, rod pocket drapes will typically look casual or appear to have more of a soft look; curtains that are hung with rings or have a more structured header offer their more tailored look of the overall appearance.
To construct a basic rod pocket drape, fold the top edge down of the fabric, press the fold, then fold down the top edge of the fabric again to the depth desired for the rod pocket, and then sew along the top edge of the fabric.
The pocket must be wide enough to allow the rod to slide through, but not so loose that when the curtain is hung the folds will appear to hang unevenly.
This is where easy draping diy comes in. You do not need to have an elaborate custom header to achieve a beautiful room. A simple and easy to assemble top finish often looks better than a complicated one.
Step 6: Hem the Bottom Last
Usually, the final stage of making curtains is the bottom hem. By doing so, you will know for sure what your finished length should be before you finish sewing and setting the hem. Once you hang your curtains on the rod, you will be able to pin them to fall exactly where you would like them to be.Many tutorials today say to use a deeper bottom hem because it will make the curtains LOOK more substantial or professional, and using the press to help sew the hem will help to keep the actual textile looking nice and crisp the entire time you have these curtains! (The Spruce).
A good rule of thumb to follow when determining how far off the floor you would like your curtains to hang is that you should be able to let them hang for a while (1, 3 days) so that they have time to settle. After that, pin the bottom hem just above or even touch the floor. That little adjustment will create such a difference visually.Curtains, when they’re too short will leave you with the impression of an uncompleted space; however, hanging them at proper heights creates a feeling of purpose and balance in your environment.(The Spruce).
A Simple No, Sew Version for Beginners
Last, you will need to complete your bottom hem. You do this to be able to check the final length for your drop. The reason this is a great idea is that after hanging your curtain on the rod, you can pin the hem of the curtain to the exact location you want the curtain to drop. It is also suggested in many tutorials that you have a deeper bottom hem to give your curtains a more professional and heavier look when pressed prior to sewing to keep the edge crisp. (The Spruce).
Common Mistakes to Avoid
Not measuring and guessing is a huge error. The second biggest mistake is not adding to the fabric for the hems and header. Another very common error is skipping the iron. This may seem minor, but this can create a more or less finished look than what most people would consider normal.
Lastly, avoid making the curtains short. Generally speaking, the goal of curtains in most rooms is to either “float” or “lightly break” or just “hit” the floor depending on the type of style you want. Hanging the curtains too high from the floor can create the illusion that the room is smaller and less professional than they could be. (The Spruce)
Final Thoughts
- One benefit of making your own curtains (despite their being handmade) is that you can select any length, colour or edging that suits your decor.
- You can create something that is specific to your space and still be within your budget.
- This combination of flexibility and financial responsibility can lead to an exceptional result!
- For me, the best part about this process is not finishing the first curtain, but rather seeing how the finished panel significantly alters the look of the entire room.
- Once you have hung the first curtain, you will discover how many more curtain panels are needed to enhance the overall aesthetic of the room!
- It makes the room seem softer; more purposeful; and more uniquely yours.
- This project, like other projects of a similar nature, is about something besides fabric and thread; it’s not only about measuring and hem sewing, but rather, it can turn your standard window into a finished feature of your house.
Additional Resources
- The Spruce – DIY Curtains Guide: A trusted home improvement resource offering step-by-step instructions for measuring, sewing, and creating both simple and advanced DIY drapery designs.
- HGTV – DIY Curtains Ideas: Provides creative curtain styling inspiration, budget-friendly DIY window treatment ideas, and modern home décor solutions.


